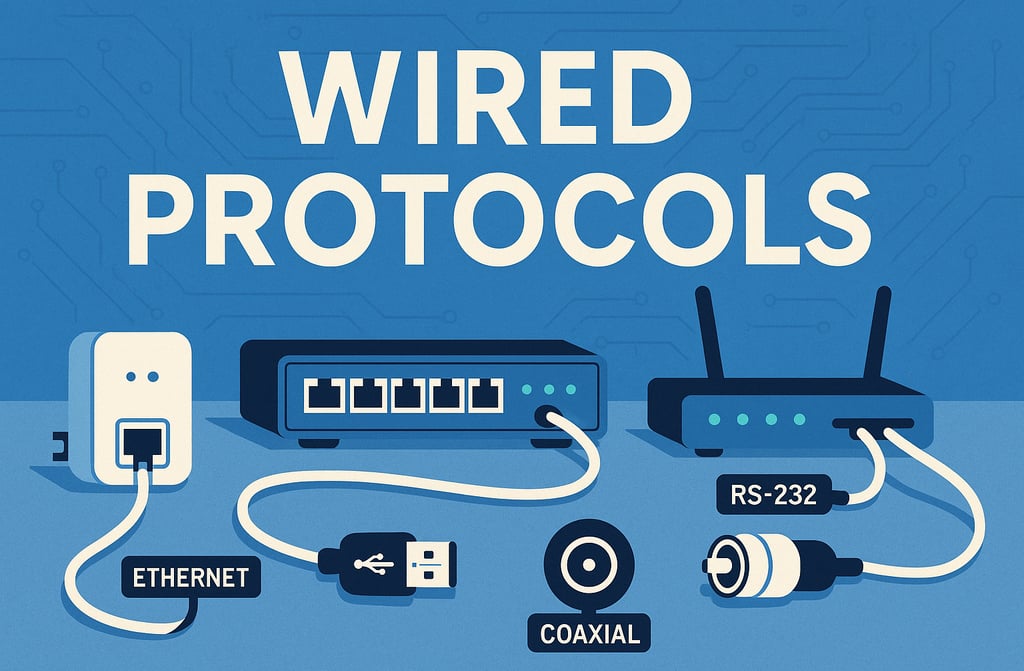
Wired Communication Protocols: A Practical Guide to UART, SPI, and I2C
11/16/20256 min read
When building electronics projects, getting different components to talk to each other is essential. While wireless communication gets a lot of attention, wired protocols remain the backbone of embedded systems due to their reliability, simplicity, and speed. In this guide, we'll explore the three most common wired communication protocols—UART, SPI, and I2C—with practical Arduino and ESP32 examples you can use right away.
Understanding the Big Three
Before diving into code, let's understand what makes each protocol unique:
UART (Universal Asynchronous Receiver-Transmitter) is the simplest protocol, using just two wires for full-duplex communication. It's asynchronous, meaning devices don't share a clock signal—they just agree on a baud rate beforehand. Think of it as two people having a phone conversation: they don't need to be perfectly synchronized, just speaking at roughly the same pace.
SPI (Serial Peripheral Interface) is faster and uses a master-slave architecture with a shared clock. It requires at least four wires but can achieve much higher speeds than UART. Imagine a teacher (master) calling on students (slaves) one at a time—everyone hears the same clock ticking.
I2C (Inter-Integrated Circuit) is the most elegant, using only two wires to connect multiple devices on the same bus. Each device has a unique address, like houses on a street. It's slower than SPI but incredibly efficient for connecting many sensors and modules.
UART Communication
UART is perfect for simple point-to-point communication, like connecting two microcontrollers or talking to GPS modules and Bluetooth transceivers.
Arduino UART Example
Master (Transmitter):
// Arduino UART Transmitter // Connect TX (Pin 1) to RX of receiver // Connect GND to GND void setup() { Serial.begin(9600); // Initialize UART at 9600 baud pinMode(LED_BUILTIN, OUTPUT); } void loop() { // Send sensor reading int sensorValue = analogRead(A0); Serial.print("Sensor: "); Serial.println(sensorValue); // Blink LED to show transmission digitalWrite(LED_BUILTIN, HIGH); delay(100); digitalWrite(LED_BUILTIN, LOW); delay(900); }
Slave (Receiver):
// Arduino UART Receiver // Connect RX (Pin 0) to TX of transmitter // Connect GND to GND String receivedData = ""; void setup() { Serial.begin(9600); // Must match transmitter baud rate pinMode(LED_BUILTIN, OUTPUT); } void loop() { // Check if data is available if (Serial.available() > 0) { receivedData = Serial.readStringUntil('\n'); // Process received data if (receivedData.startsWith("Sensor: ")) { int value = receivedData.substring(8).toInt(); // Control LED based on received value if (value > 512) { digitalWrite(LED_BUILTIN, HIGH); } else { digitalWrite(LED_BUILTIN, LOW); } } } }
ESP32 UART Example
The ESP32 has three hardware UART ports, giving you more flexibility:
ESP32 Transmitter (using UART2):
// ESP32 UART Transmitter // TX2 = GPIO17, RX2 = GPIO16 HardwareSerial SerialPort(2); // Use UART2 void setup() { Serial.begin(115200); // For debugging SerialPort.begin(9600, SERIAL_8N1, 16, 17); // RX, TX pinMode(LED_BUILTIN, OUTPUT); } void loop() { float temperature = random(200, 300) / 10.0; // Simulate sensor SerialPort.print("TEMP:"); SerialPort.println(temperature); Serial.println("Sent: " + String(temperature)); // Debug digitalWrite(LED_BUILTIN, !digitalRead(LED_BUILTIN)); delay(1000); }
ESP32 Receiver (using UART2):
// ESP32 UART Receiver // TX2 = GPIO17, RX2 = GPIO16 HardwareSerial SerialPort(2); void setup() { Serial.begin(115200); // For debugging SerialPort.begin(9600, SERIAL_8N1, 16, 17); // RX, TX } void loop() { if (SerialPort.available()) { String data = SerialPort.readStringUntil('\n'); if (data.startsWith("TEMP:")) { float temp = data.substring(5).toFloat(); Serial.print("Received temperature: "); Serial.println(temp); if (temp > 25.0) { Serial.println("Warning: High temperature!"); } } } }
SPI Communication
SPI is ideal when you need high-speed data transfer, like SD cards, displays, or high-speed ADCs.
Arduino SPI Example
Master:
// Arduino SPI Master // MOSI = Pin 11, MISO = Pin 12, SCK = Pin 13, SS = Pin 10 #include <SPI.h> const int SS_PIN = 10; void setup() { Serial.begin(9600); pinMode(SS_PIN, OUTPUT); digitalWrite(SS_PIN, HIGH); // Deselect slave SPI.begin(); SPI.setClockDivider(SPI_CLOCK_DIV16); // 1MHz clock } void loop() { // Read sensor int sensorValue = analogRead(A0); // Split into two bytes byte highByte = (sensorValue >> 8) & 0xFF; byte lowByte = sensorValue & 0xFF; // Send data to slave digitalWrite(SS_PIN, LOW); // Select slave SPI.transfer(highByte); SPI.transfer(lowByte); digitalWrite(SS_PIN, HIGH); // Deselect slave Serial.print("Sent: "); Serial.println(sensorValue); delay(500); }
Slave:
// Arduino SPI Slave // MOSI = Pin 11, MISO = Pin 12, SCK = Pin 13, SS = Pin 10 #include <SPI.h> volatile byte receivedData[2]; volatile int dataIndex = 0; volatile bool dataReady = false; void setup() { Serial.begin(9600); pinMode(MISO, OUTPUT); // Must be output on slave SPCR |= BV(SPE); // Enable SPI in slave mode SPCR |= BV(SPIE); // Enable SPI interrupt SPI.attachInterrupt(); } // SPI interrupt routine ISR (SPI_STC_vect) { byte data = SPDR; // Read received byte if (dataIndex < 2) { receivedData[dataIndex] = data; dataIndex++; if (dataIndex == 2) { dataReady = true; dataIndex = 0; } } } void loop() { if (dataReady) { // Reconstruct 16-bit value int value = (receivedData[0] << 8) | receivedData[1]; Serial.print("Received: "); Serial.println(value); dataReady = false; } }
ESP32 SPI Example
ESP32 Master:
// ESP32 SPI Master // MOSI = GPIO23, MISO = GPIO19, SCK = GPIO18, CS = GPIO5 #include <SPI.h> const int CS_PIN = 5; void setup() { Serial.begin(115200); pinMode(CS_PIN, OUTPUT); digitalWrite(CS_PIN, HIGH); SPI.begin(18, 19, 23, CS_PIN); // SCK, MISO, MOSI, CS SPI.setFrequency(1000000); // 1MHz SPI.setDataMode(SPI_MODE0); } void loop() { // Create test data byte command = 0xAB; // Example command int value = random(0, 1024); digitalWrite(CS_PIN, LOW); SPI.transfer(command); SPI.transfer16(value); // Send 16-bit value digitalWrite(CS_PIN, HIGH); Serial.print("Sent command: 0x"); Serial.print(command, HEX); Serial.print(", Value: "); Serial.println(value); delay(1000); }
ESP32 Slave:
// ESP32 SPI Slave// MOSI = GPIO23, MISO = GPIO19, SCK = GPIO18, CS = GPIO5 #include <SPI.h> SPIClass * hspi = NULL; const int CS_PIN = 5; void setup() { Serial.begin(115200); pinMode(CS_PIN, INPUT); hspi = new SPIClass(HSPI); hspi->begin(18, 19, 23, CS_PIN); hspi->setDataMode(SPI_MODE0); } void loop() { if (digitalRead(CS_PIN) == LOW) { byte command = hspi->transfer(0x00); byte highByte = hspi->transfer(0x00); byte lowByte = hspi->transfer(0x00); int value = (highByte << 8) | lowByte; Serial.print("Command: 0x"); Serial.print(command, HEX); Serial.print(", Value: "); Serial.println(value); delay(10); } }
I2C Communication
I2C is perfect for connecting multiple sensors and modules on the same two-wire bus. Each device has a unique 7-bit or 10-bit address.
Arduino I2C Example
Master (Reading from Slave):
// Arduino I2C Master // SDA = A4, SCL = A5 #include <Wire.h> const int SLAVE_ADDRESS = 0x08; void setup() { Serial.begin(9600); Wire.begin(); // Join I2C bus as master } void loop() { // Request 2 bytes from slave Wire.requestFrom(SLAVE_ADDRESS, 2); if (Wire.available() >= 2) { byte highByte = Wire.read(); byte lowByte = Wire.read(); int receivedValue = (highByte << 8) | lowByte; Serial.print("Received from slave: "); Serial.println(receivedValue); } delay(500); // Send command to slave Wire.beginTransmission(SLAVE_ADDRESS); Wire.write(0x01); // Command byte Wire.write(123); // Data byte Wire.endTransmission(); delay(500); }
Slave (Responding to Master):
// Arduino I2C Slave // SDA = A4, SCL = A5 #include <Wire.h> const int SLAVE_ADDRESS = 0x08; int sensorValue = 0; void setup() { Serial.begin(9600); Wire.begin(SLAVE_ADDRESS); // Join I2C bus with address Wire.onRequest(requestEvent); // Register request handler Wire.onReceive(receiveEvent); // Register receive handler } void loop() { // Update sensor reading sensorValue = analogRead(A0); delay(100); } // Function that executes when master requests data void requestEvent() { byte highByte = (sensorValue >> 8) & 0xFF; byte lowByte = sensorValue & 0xFF; Wire.write(highByte); Wire.write(lowByte); Serial.print("Sent to master: "); Serial.println(sensorValue); } // Function that executes when master sends data void receiveEvent(int numBytes) { while (Wire.available()) { byte data = Wire.read(); Serial.print("Received from master: "); Serial.println(data); } }
ESP32 I2C Example
ESP32 Master:
// ESP32 I2C Master // SDA = GPIO21, SCL = GPIO22 (default) #include <Wire.h> const int SLAVE_ADDRESS = 0x08; void setup() { Serial.begin(115200); Wire.begin(); // Default pins: SDA=21, SCL=22 // Or specify custom pins: Wire.begin(SDA_PIN, SCL_PIN); } void loop() { // Send command to slave Wire.beginTransmission(SLAVE_ADDRESS); Wire.write(0x10); // Register address Wire.write(0x55); // Data to write byte error = Wire.endTransmission(); if (error == 0) { Serial.println("Write successful"); } else { Serial.print("Write error: "); Serial.println(error); } delay(500); // Read from slave Wire.requestFrom(SLAVE_ADDRESS, 4); if (Wire.available() >= 4) { int temp = Wire.read() << 8 | Wire.read(); int humidity = Wire.read() << 8 | Wire.read(); Serial.print("Temperature: "); Serial.print(temp / 10.0); Serial.print("°C, Humidity: "); Serial.print(humidity / 10.0); Serial.println("%"); } delay(1000); }
ESP32 Slave:
// ESP32 I2C Slave // SDA = GPIO21, SCL = GPIO22 (default) #include <Wire.h> const int SLAVE_ADDRESS = 0x08; int temperature = 250; // 25.0°C int humidity = 600; // 60.0% void setup() { Serial.begin(115200); Wire.begin(SLAVE_ADDRESS); // Join I2C as slave Wire.onRequest(requestEvent); Wire.onReceive(receiveEvent); Serial.println("I2C Slave initialized"); } void loop() { // Simulate sensor readings temperature = random(200, 300); // 20-30°C humidity = random(400, 800); // 40-80% delay(100); } void requestEvent() { // Send temperature and humidity Wire.write((temperature >> 8) & 0xFF); Wire.write(temperature & 0xFF); Wire.write((humidity >> 8) & 0xFF); Wire.write(humidity & 0xFF); Serial.println("Data sent to master"); } void receiveEvent(int numBytes) { byte registerAddr = Wire.read(); Serial.print("Received register: 0x"); Serial.print(registerAddr, HEX); while (Wire.available()) { byte data = Wire.read(); Serial.print(", Data: 0x"); Serial.print(data, HEX); } Serial.println(); }
Choosing the Right Protocol
Use UART when:
Connecting two devices point-to-point
You need simple, reliable communication
Speed requirements are moderate (up to ~1 Mbps typically)
You're interfacing with GPS, Bluetooth modules, or serial devices
Use SPI when:
You need high-speed data transfer (10+ Mbps)
Working with SD cards, displays, or high-speed ADCs
You don't mind using more pins
Only one master device is needed
Use I2C when:
Connecting multiple devices on the same bus
Pin count is limited (only 2 pins needed)
Moderate speed is acceptable (100 kHz to 400 kHz standard)
Working with sensors, EEPROMs, or RTCs
Wiring Tips
UART: Connect TX to RX and RX to TX between devices. Always connect ground.
SPI: Keep wires short (under 30cm ideally) for reliable high-speed communication. Use a common ground.
I2C: Add pull-up resistors (typically 4.7kΩ) on both SDA and SCL lines. Many modules have these built-in, but external ones help with longer wires or multiple devices.
Common Pitfalls
Voltage levels: Arduino uses 5V logic, ESP32 uses 3.3V. Use level shifters when mixing them.
Baud rate mismatch: UART requires both devices to use the same baud rate.
Address conflicts: Each I2C device needs a unique address.
Missing pull-ups: I2C won't work reliably without pull-up resistors.
Shared ground: All devices must share a common ground reference.
Conclusion
Each wired protocol has its sweet spot. UART excels at simple device-to-device communication, SPI dominates high-speed applications, and I2C shines when you need to connect many devices with minimal wiring. With these working examples, you can start building more complex projects that communicate reliably and efficiently.
Experiment with these examples, modify them for your needs, and you'll quickly become comfortable with all three protocols. Happy making!